Instructions for Use (Download FULL Instructions PDF)
▶ IMPORTANT - Read Before Using!
▶ Instructions for Use Without Taping
|
BEFORE USING YOUR Health Recovery Chips |
|
QUESTION: |
Instructions With Taping |
|
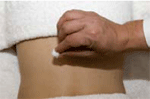
Always wash clean (then dry) the areas on your skin (oil, makeup, dirt, etc) where you will be applying the Health Recovery Chips on your body BEFORE the stones come into contact with the skin. |
|
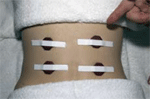
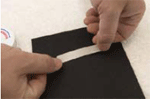
Select the length of tape required for the acupuncture point you will be placing the stones tear that length from the roll of tape. |
|
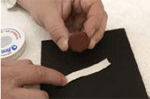
Place the tape onto a flat surface with the sticky side up which prepares you to place the Health Recovery Chip onto the tape. |
|
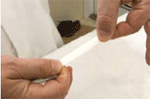
Take a Health Recovery Chip and with the logo side down (flat side up always tape the same side) place it (logo side) onto the sticky side of the tape. Touch the sticky side of the tape as little as possible with your fingers. |
|
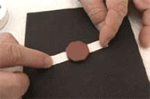
Carefully move your fingers away from the tape again, touch the sticky side of the tape as little as possible with your fingers to ensure the tape will remain secure for the treatment. |
|
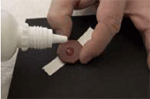
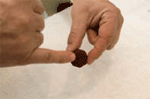
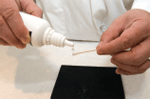
Hold each side of the Health Recovery Chip as shown and place a few drops of the Surface Liquid onto the exposed face of the stone. |
|
Spread the Surface Liquid to cover the entire face of the Health Recovery Chip with your finger, a cotton swab or the jade wand to spread the SURFACE LIQUID. |
|
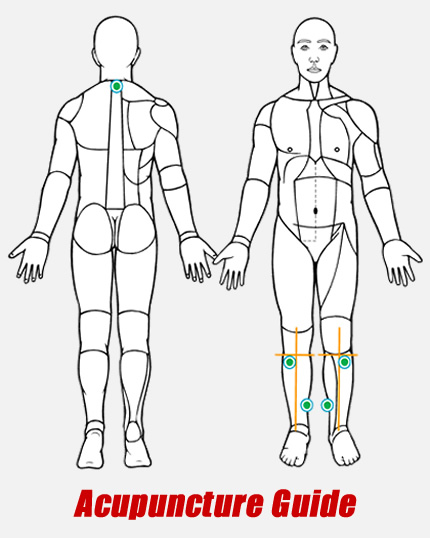
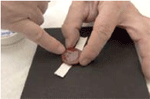
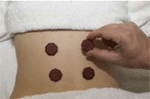
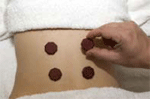
Place each chip in the appropriate location on the body. These can be applied as shown in the Health Recovery Chip Acupuncture Guide. You can also apply the chips directly on the areas of the body that are causing discomfort. It should be obvious but remember to place the face of the chip with the liquid applied side against your body. |
|
Continue to place all chips on the appropriate points on the body until completed leave on the body for 45 ?60 mins per treatment. If the Acupuncture Guide calls for more chips than you own, you can proceed in 2 or 3 separate sessions so that all points are eventually covered in the course of 1 or 2 days. |
|
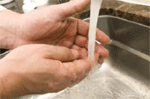
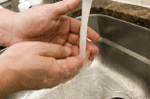
After each time you handle the Health Recovery Chips ensure you wash/rinse your hands thoroughly with water to prevent any further heat transfer to your eyes, nose, mouth or other mucous membranes. If the ACTIVATED LIQUID comes into contact with any of your mucous membranes, including your eyes, you may experience discomfort, but remain calm. Immediately rinse the affected area thoroughly with water until the discomfort disappears. Rinsing the affected areas should take 5 -10 seconds or more. |
|
During the treatment you may experience an initial warming effect which can move to a very intense heat.
This is your body's own heat the actual chips do not significantly change temperature. The skin surrounding
the points may become flushed and look red. The redness should disappear within 15-30 minutes upon completion of your treatment.
|
|


Instructions Without Taping |
|
Always wash clean (then dry) the areas on your skin (oil, makeup, dirt, etc) where you will be applying the Health Recovery Chips on the body BEFORE the stones come into contact with the skin. |
|
Hold each side of the Health Recovery Chip as shown and place a few drops of the Surface Liquid onto the exposed face of the stone. We recommend using the flat face to contact skin, which will leave logo facing up once you place the Health Recovery Chip onto the skin. |
|
Spread the Surface Liquid to cover the entire face of the Health Recovery Chip with your finger, cotton swab or the jade wand to spread the SURFACE LIQUID. |
|
Place each chip in the appropriate location on the body. These can be applied as shown in the Health Recovery Chip Acupuncture Guide or on the areas of the body that are causing discomfort. It should be obvious but remember to place the face of the chip with the liquid applied side against the body. Continue to place all chips on the appropriate points on the body until completed leave on the body for 45 - 60 mins per treatment. If the Acupuncture Guide calls for more chips than you own, you can proceed in 2 or 3 separate sessions so that all points are eventually covered in the course of 1 or 2 days. |
|
After each time you handle the Health Recovery Chips ensure you wash/rinse your hands thoroughly with water to prevent any further heat transfer to your eyes, nose, mouth or other mucous membranes. If the ACTIVATED LIQUID comes into contact with any of your mucous membranes, including your eyes, you may experience discomfort, but remain calm. Immediately rinse the affected area thoroughly with water until the discomfort disappears. Rinsing the affected areas should take 5 -10 seconds or more. |
|
During the treatment you may experience an initial warming effect which can transition to a very intense heat.
This is the body's own heat the actual chips do not change temperature. The skin surrounding the points may become flushed and look red.
The redness should disappear within 15-30 minutes upon completion of your treatment. If irritation persists, take a day or so off between treatments until it disappears.
|
|

Cleaning the Health Recovery Chips |
|
Occasionally you should clean your Health Recovery Chips to enhance their longevity once or twice per month should be sufficient ?depending on usage). | |
Place a drop or two of the SURFACE LIQUID (best) or alcohol (second best) onto a cotton swab. UV light is also a safe and effective method for cleaning your Health Recovery Chips. |
|
Gently move the cotton swab around the surface of the Health Recovery Chips. |
|
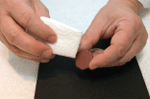
Gently shake the excess water from the Health Recovery Chip after cleaning (you may gently pat but DO NOT RUB the chips with paper towel to absorb the excess water) and lay them on a flat surface to air dry. Store your Health Recovery Chips in a dry area when not in use. |
|
After each time you handle the Health Recovery Chips ensure you wash/rinse your hands thoroughly with water to prevent any further heat transfer to your eyes, nose, mouth or other mucous membranes. |
|

If the ACTIVATED LIQUID comes into contact with any of your mucous membranes, including your eyes, you may experience discomfort, but remain calm. Immediately rinse the affected area thoroughly with water until the discomfort disappears. Rinsing the affected areas should take 5 -10 seconds or more.